Fields of Mistria Farm Layout Ideas & Designs
Steal these layouts: a season-by-season gallery of real in-game farms, creative decor builds to copy, farm name inspiration, and the planning rules that make a design work.
📐 New: Plan Before You Till
Sketch your own layout on our free interactive Farm Planner. Paint terrain, drop greenhouse and tree footprints, and export a PNG to share. If daily watering is the constraint, check the Water Sprite Statue guide before fixing the size of each crop block.
Farm Expansion & Moving Buildings
Farm Expansion 1 at the Carpenter costs 40,000t plus Refined Stone x50 and Hard Wood x50. It unlocks land to the right of the starting farm and includes the Starter Farm Bridge.
The farmhouse cannot be moved. Barn, Coop, and Greenhouse can be demolished to reclaim the blueprint and materials, then placed again. Moving a Greenhouse destroys crops inside.
Source: wiki Farm (checked 2026-09-12).
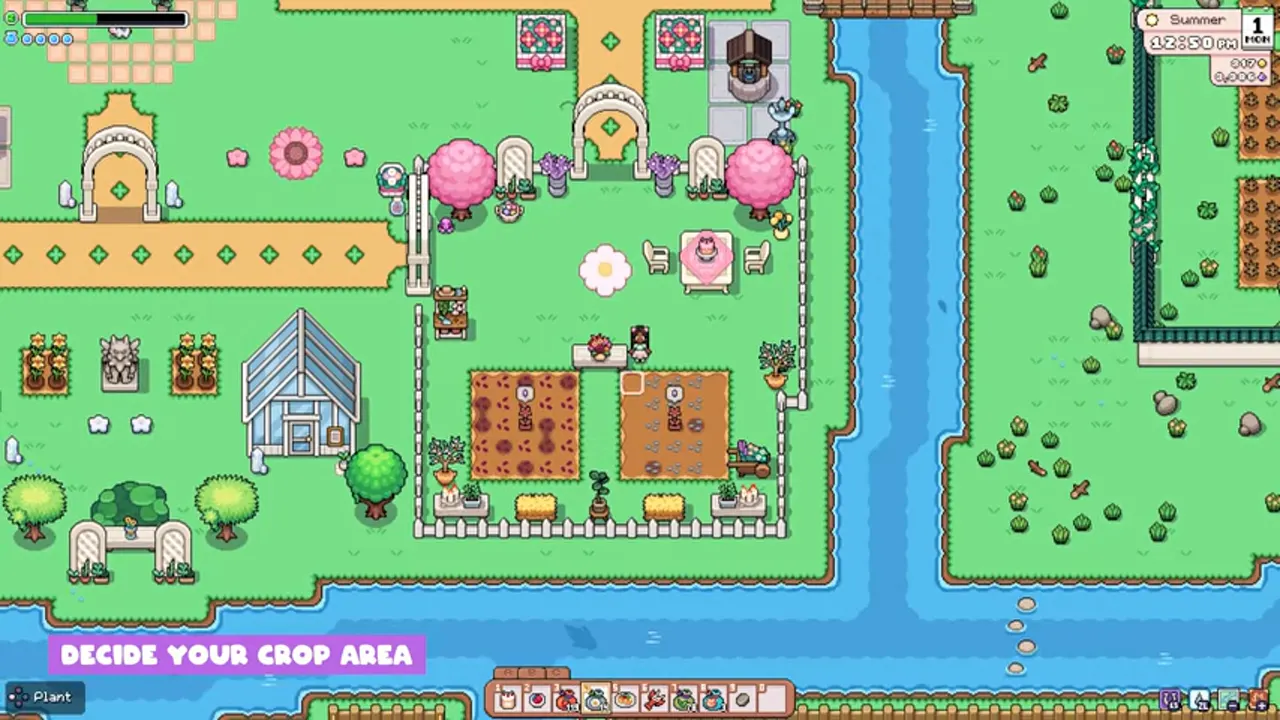
Farm Layout & Design Ideas by Season
Every screenshot below is a real in-game farm. Click any image to zoom in and study the arrangement.
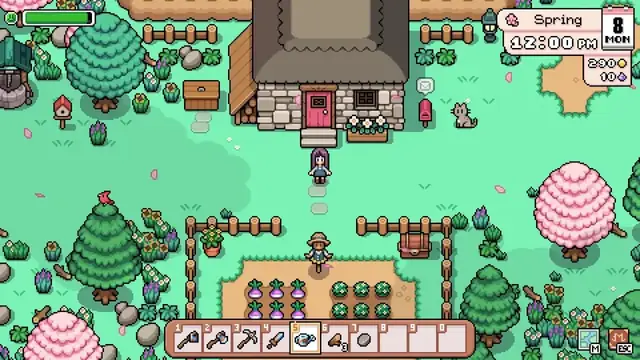
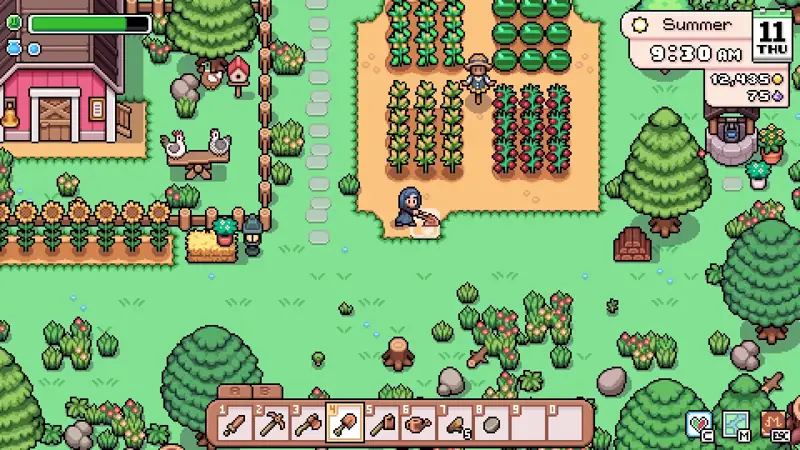
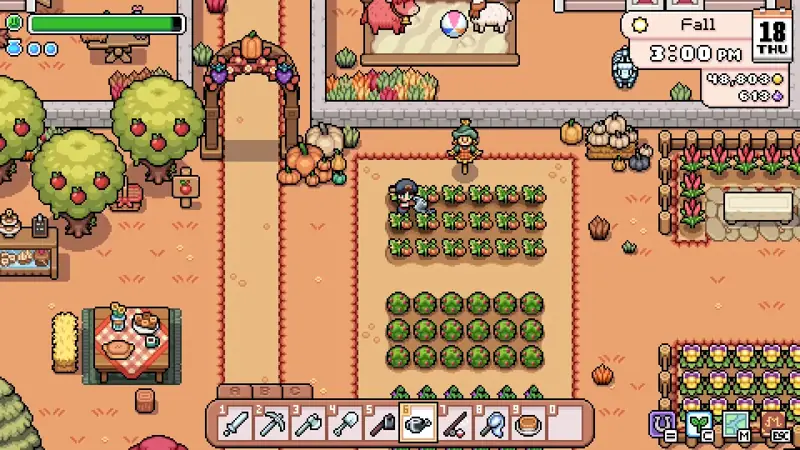
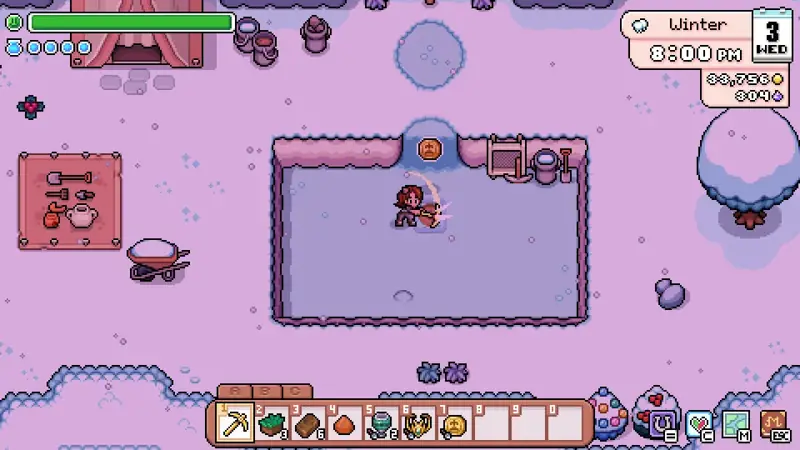
Creative Farm Designs to Copy
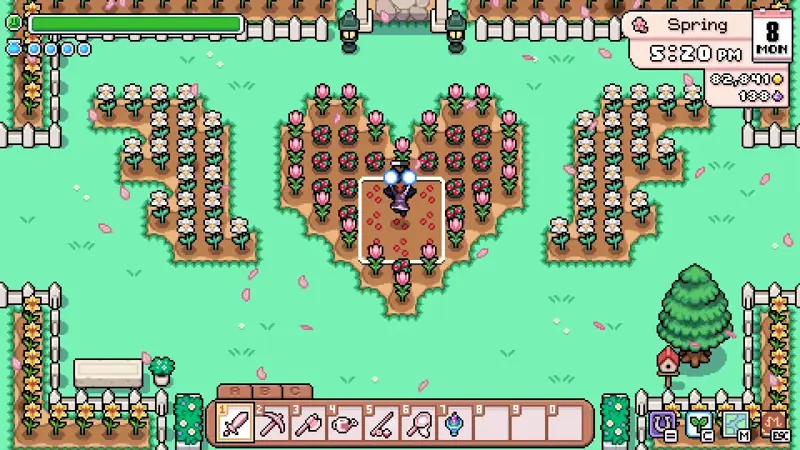
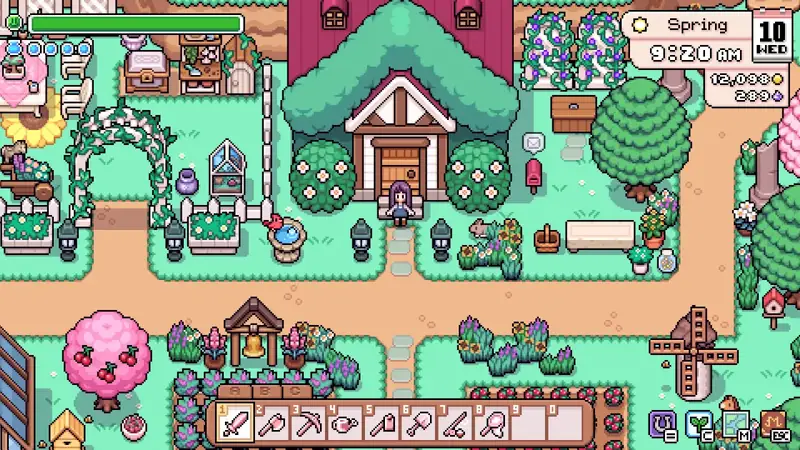
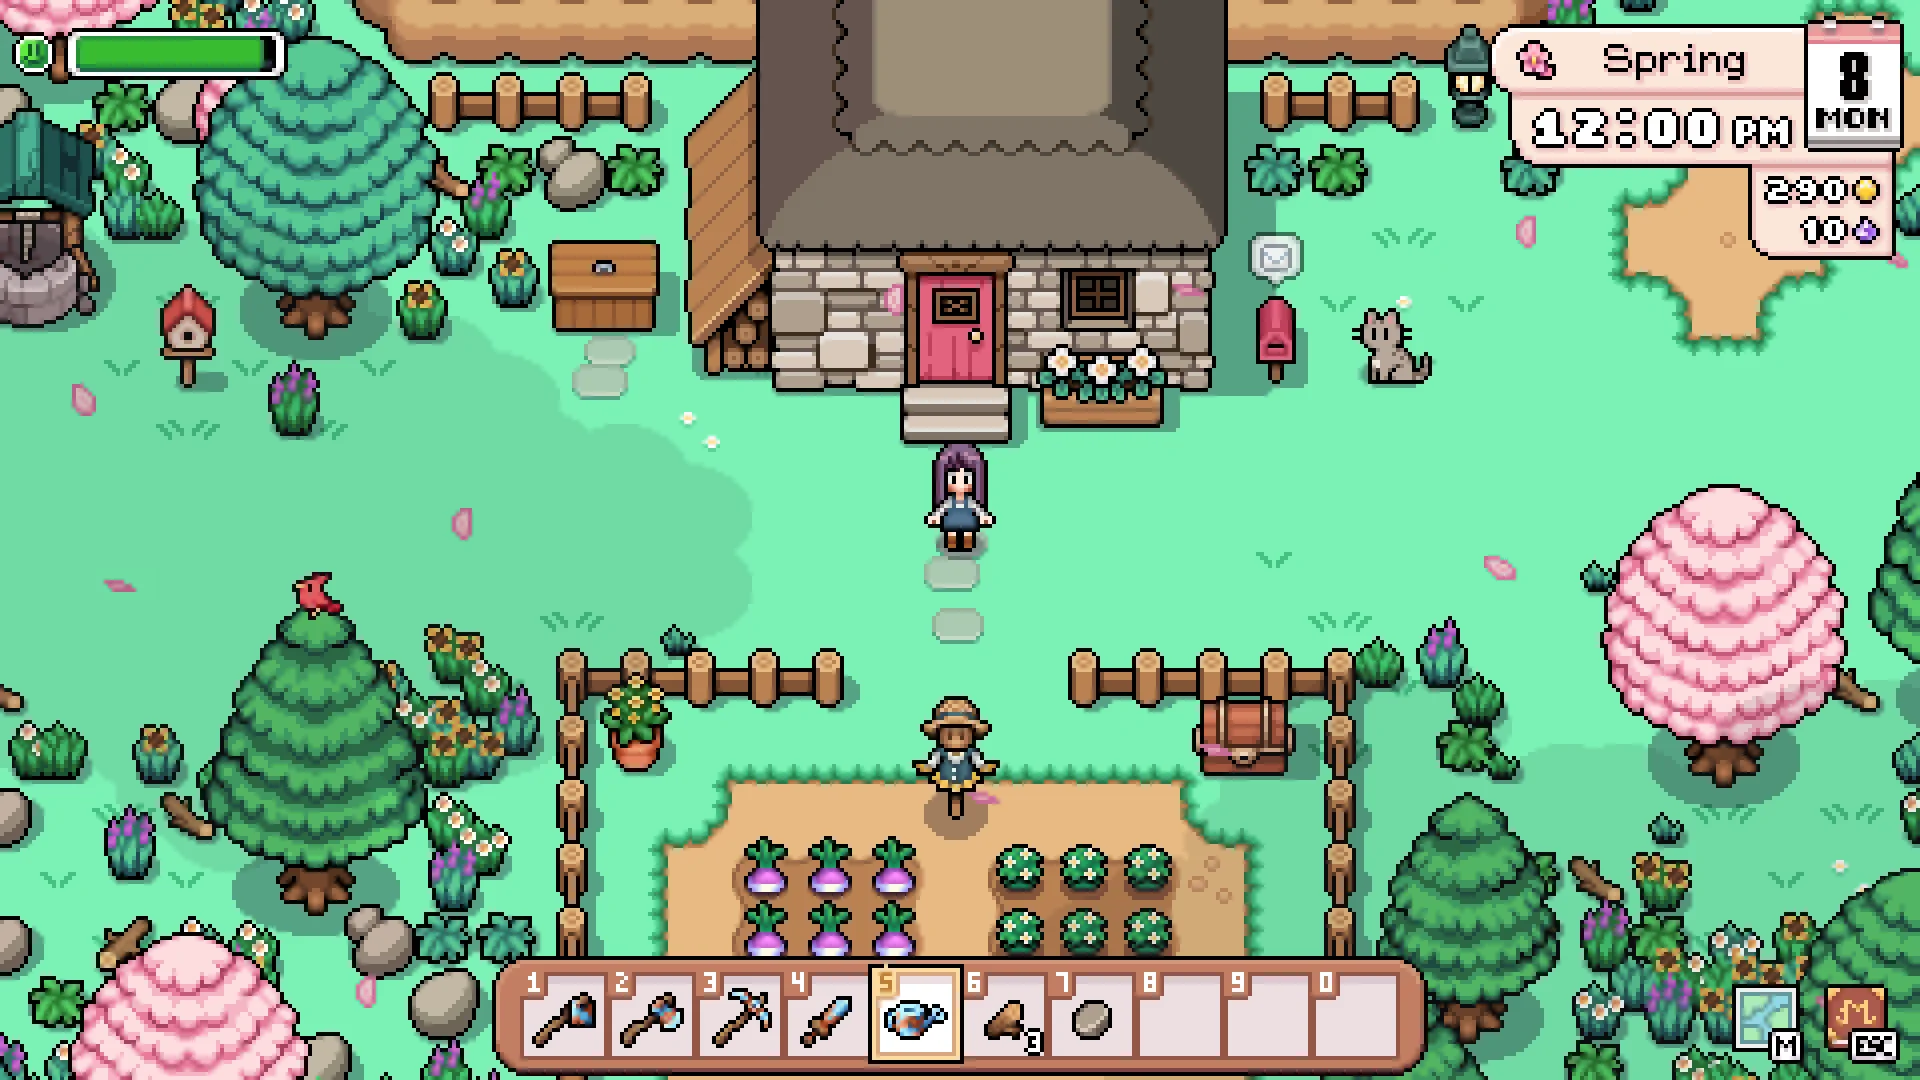

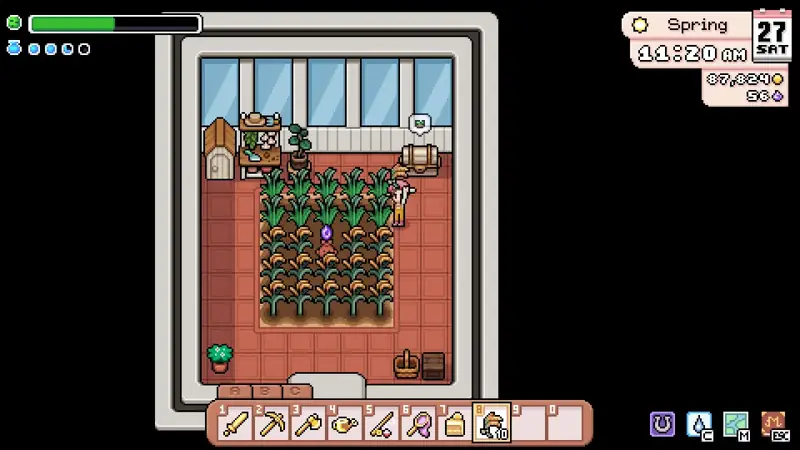
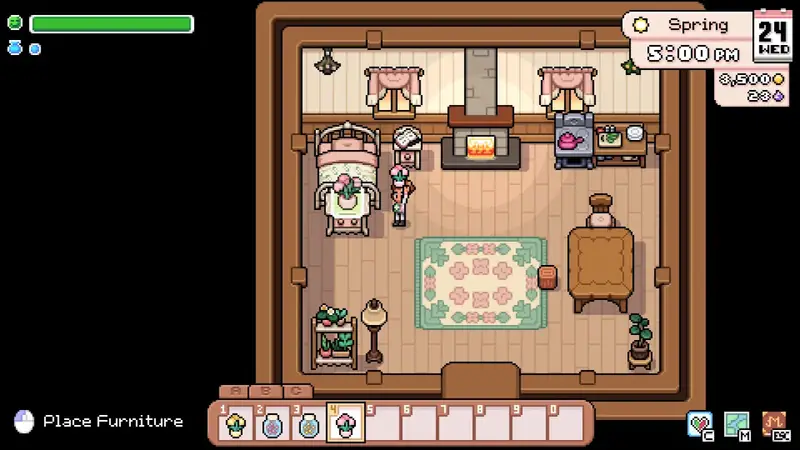
Want your farm featured here? We're collecting community layouts (with full credit) — send us yours through the feedback button.
Your Farm at a Glance
Your farm sits south of Mistria, with the town to the north and Sweetwater Farm to the west. It is gifted to you by Adeline at the start of the game as part of the town-rebuilding deal, and it is where you will spend most of your time.
You can place buildings, furniture, and decorative items anywhere on the farm outside the farmhouse. Barns, coops, and greenhouses can be moved later (you need the blueprint first), while the farmhouse and Caldarus' Shrine east of it cannot be moved.
Plan Your Crop Fields First
Crops can only grow on tilled soil, so your field layout determines how much you can plant. In the early game, keep your tilled area manageable, stamina is the real limit, and over-planting leaves you no energy for fishing, mining, or town requests.
Leave room for expansion: each season brings new crops, and regrowable crops like strawberries, corn, and tea stay in the ground all season, so blocking off dedicated field zones from the start saves you from re-tilling later.
Build Fences Around Your Crops
Weeds, branches, stones, and non-fruit trees respawn over time and can even regrow on your farmed land. Fences are the cheapest defense: each costs 10 wood to craft at the carpenter's bench, and they keep debris from spawning on your fields. Unlocking the "Deliberate Debris" skill later reduces spawns too.
Place fences in a clean grid around crop zones, with a gate or gap for walking. Fence in animal pasture as well so livestock stay close to their barn and you can pet, feed, and breed them easily.
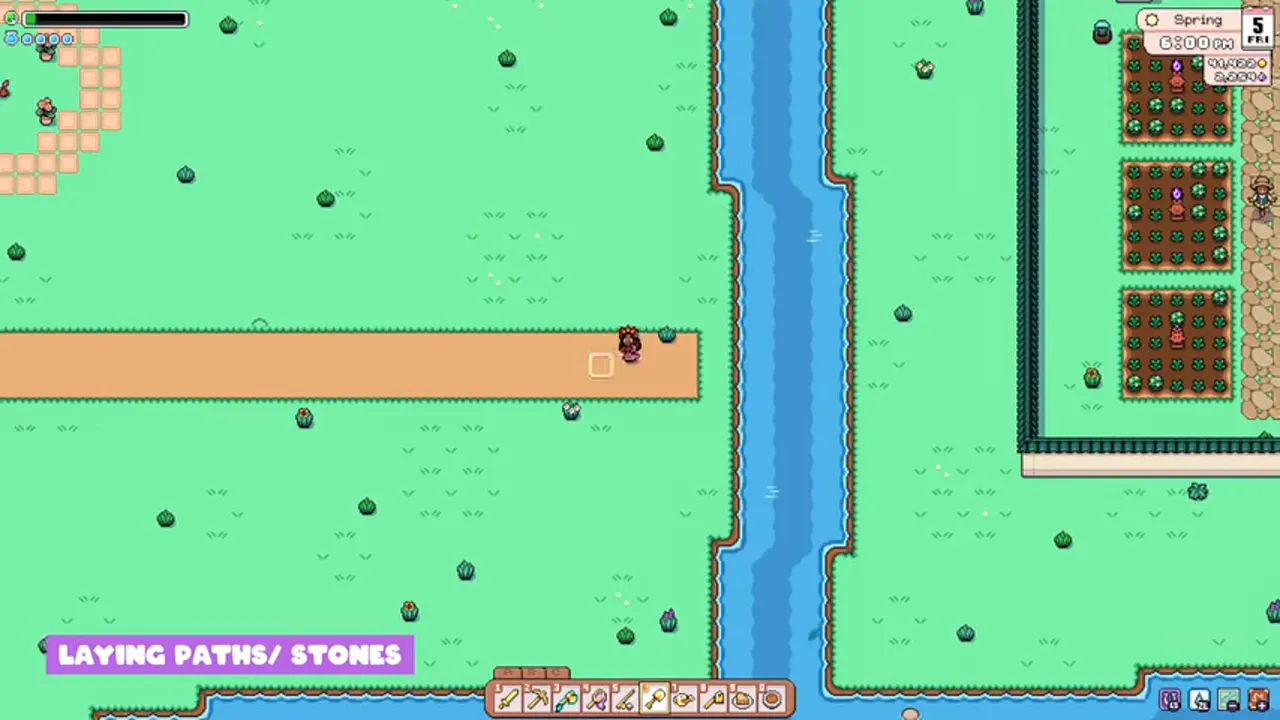
Zone Your Farm
A simple three-zone layout keeps things organized:
- Home zone: farmhouse, shipping bin, and a small decoration area close to the door for easy daily drop-offs.
- Farming zone: large tilled fields, ideally with paths between rows so you can water and harvest without stepping on crops.
- Animal zone: barn and coop with fenced pasture, plus a greenhouse once you unlock it.
Keep wood, stone, and common materials in storage so upgrades and requests are never delayed. Try not to spend all your gold on seeds, reserve some for tool purchases and blacksmith fees.
Farm Decor & Design Tips
Furniture and decorations can be placed both inside the farmhouse and outside on the farm. Use paths to connect buildings, line walkways with flowers or lamps, and leave a festival-ready plaza near the shipping bin.
Once the museum's Archaeology wing hits 15 completed sets, you get Color Paving Stones. Use them for custom farm paths, or as indoor floor tiles if you want a checkerboard kitchen. Recipes differ by color, so do not vendor every monster drop. Full unlock path: the museum guide.
You can remove anything by hitting it with your pickaxe, so experiment freely. When the mines open, keep a small chest near the farm's west edge as a drop point for long mining trips.
Raising animals too? The animals guide covers barn and coop sizes so your animal zone is the right footprint from day one.
Farm Name Ideas
Naming your homestead is half the fun of a fresh save. Some directions players take, whether for the farm itself or the save file:
- Cozy classics: Honeybee Hollow, Foxglove Fields, Willowbrook, Cinnamon Acres, Lantern Grove.
- Mistria lore: Dragonrest Farm, Essence Meadow, Starfall Fields, Old Seal Homestead, Caldarus' Rest.
- Puns: Mist Opportunity, Tesserae Terrace, Gone with the Mist, Farm and Away, The Mistria Address.
For seasonal profit planning, pair your layout with the most profitable crops guide.
FAQ
What is the best farm layout in Fields of Mistria?
Most working farms split into three zones: a home zone around the farmhouse and shipping bin, a farming zone with walking rows between fields, and an animal zone where the barn, coop and fenced pasture sit together. The gallery above shows real in-game farms built this way.
Can you redesign your farm later?
Yes. Hitting anything with your pickaxe removes it, so you can re-till and redecorate freely. Barns, coops and greenhouses can be moved once you own the blueprint; only the farmhouse and Caldarus' Shrine stay fixed.
How do you keep weeds off your fields?
Fence them. Weeds, branches and stones respawn over time, and a fence line stops debris from spawning inside. Each fence costs 10 wood at the carpenter's bench, and the Deliberate Debris skill reduces spawns further.
Where should your first crop field go?
Right by the farmhouse door. Early on, stamina is the real limit, so a small fenced plot you can water in a minute beats a huge field. Leave open ground next to it for later seasons.
Is there a tool to plan a Fields of Mistria farm layout?
Yes, our free Farm Planner runs in the browser: paint terrain, place wiki-verified greenhouse growing areas and fruit-tree spacing, then share a link or export your plan as a PNG.
How do you move a barn or coop?
Interact with the building and remove it through its menu: the blueprint and every construction material drop back into your inventory, and you can re-place it anywhere on the farm. To move the animals themselves between buildings, use the Animals page of the game menu — the target building needs free space, and pregnant animals can't be moved.
Can you upgrade a barn or coop?
Not in place — you buy a bigger blueprint from the Carpenter instead. Medium buildings (8 animals) unlock at Ranching level 20 and Large ones (12 animals) at Ranching level 40; a Large barn is 8,000t and a Large coop 6,000t, plus wood and stone. Details in the animals guide.
Can you move fruit trees?
No. Once a sapling is planted there is no way to move the tree — the only removal is cutting it down with an axe, which destroys it (you get wood, not the tree back). Plant carefully: each tree needs a completely clear 3×3 space, which our Farm Planner can mark out.
How do you rotate furniture?
While placing or moving furniture, press R (or right click) to rotate right and Q to rotate left on keyboard — on a controller it's the Y button on the Xbox layout. All hotkeys can be reassigned under Settings → Controls.